
Caramelized onions are one of the most flavorful additions you can make in your kitchen. By slowly cooking onions until they turn deep golden brown, you unlock a rich, sweet depth that enhances everything from burgers to pastas and dips. This guide will walk you through exactly what caramelized onions are, how they differ from other cooked onions, and the foolproof way to make them at home.
We’ll also explore the best types of onions for caramelizing, whether to use butter or oil, and when to add sugar (or not). You’ll find expert tips, tasty recipes, and smart storage tricks so you can enjoy their flavor anytime.
Don’t miss our flavor-packed dinner recipes like these Moroccan Lamb Meatballs
Table of Contents
What Are Caramelized Onions?
Definition and Characteristics of Caramelized Onions
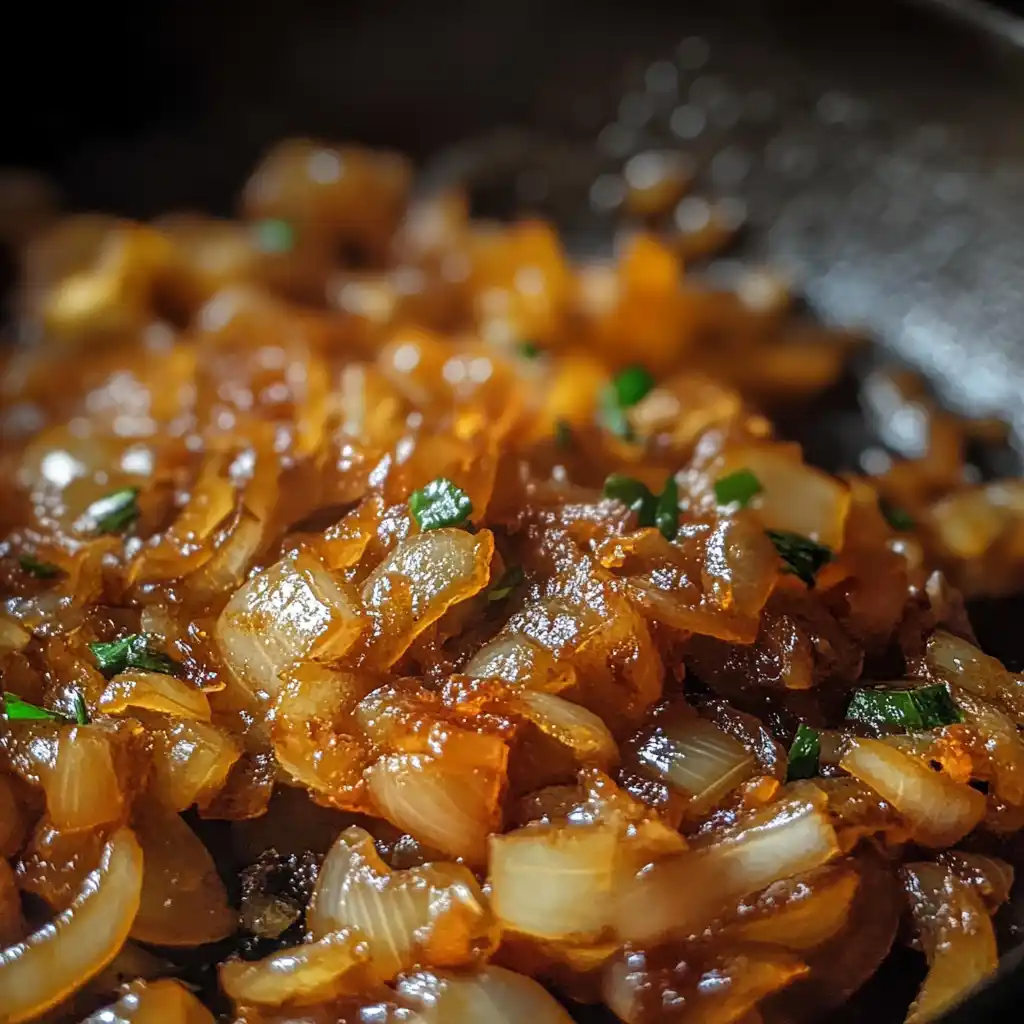
Caramelized onions are onions that have been slowly cooked over low heat until their natural sugars break down and turn a deep golden brown. This transformation isn’t just about color—it’s about flavor. What starts as a sharp, pungent bite becomes mellow, sweet, and complex with enough depth to anchor an entire dish. The process of caramelization takes time—usually 30 to 45 minutes—but the reward is a soft, jammy texture and a rich, savory sweetness.
From a chemical standpoint, caramelization is the oxidation of sugar, a process that results in the browning of food and the development of nutty, rich flavors. Unlike sautéed onions, which cook quickly over high heat and retain a bit of crunch and sharpness, caramelized onions require patience and low, slow heat to draw out their full potential.
How Caramelization Differs from Sautéing
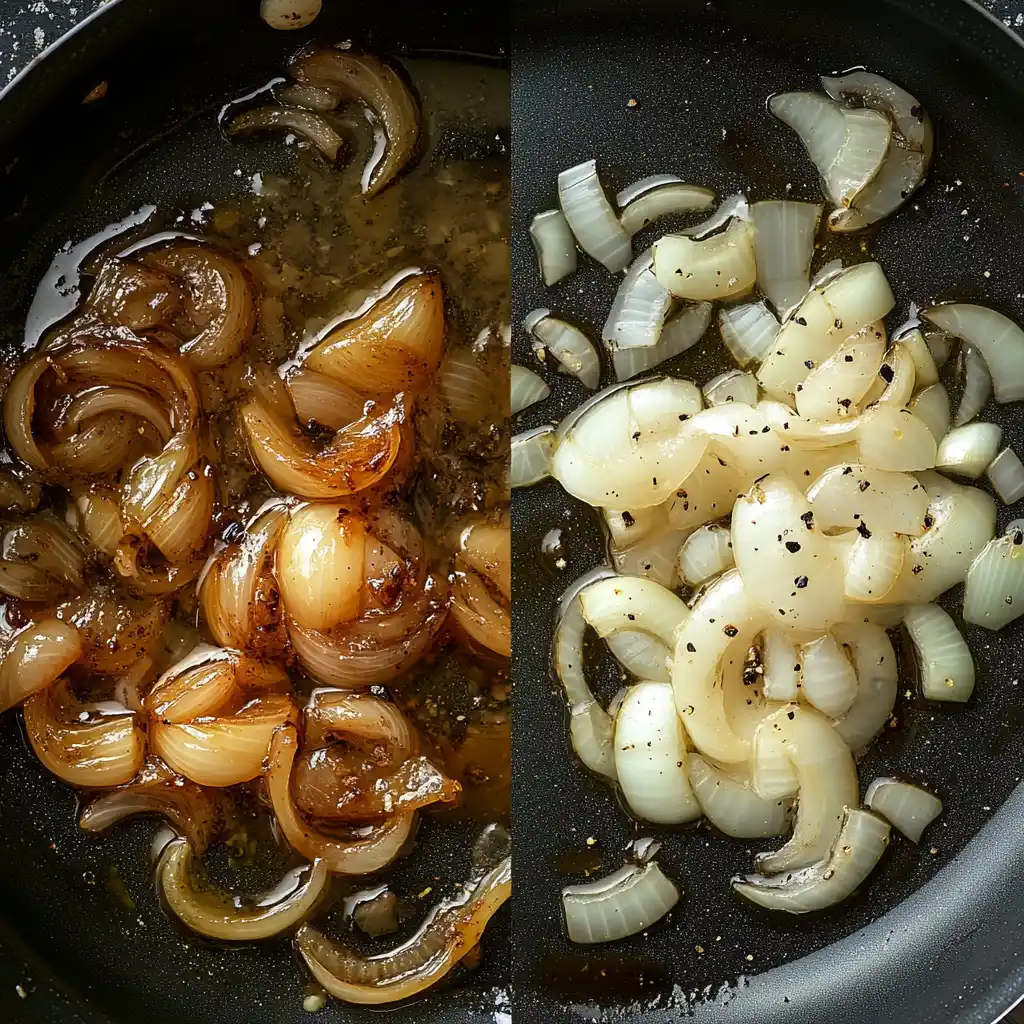
Sautéing and caramelizing might seem similar—they both involve cooking onions in a pan—but the techniques and results are quite different. Sautéed onions are typically cooked over medium-high heat for 5–10 minutes, enough to soften them and develop some browning around the edges. They’re still firm and retain some of their sharpness.
Caramelized onions, on the other hand, are all about depth. You’ll cook them low and slow, allowing the sugars within the onions to slowly break down and turn deeply golden. The texture becomes almost silky, and the flavor is sweeter, more mellow, and more nuanced.
Here’s a quick comparison:
| Feature | Sautéed Onions | Caramelized Onions |
|---|---|---|
| Cooking Time | 5–10 minutes | 30–45 minutes |
| Heat Level | Medium to high | Low |
| Flavor Profile | Sharp, slightly sweet | Deeply sweet, umami-rich |
| Texture | Slightly firm | Soft, jammy |
Benefits of Caramelizing Onions
Health and Nutritional Benefits
Caramelized onions aren’t just tasty—they bring several nutritional perks to the table. When onions are slowly cooked, their naturally occurring compounds, like quercetin and sulfur-containing antioxidants, become more concentrated and easier to digest. While the cooking process slightly reduces vitamin C, it enhances the overall flavor profile without the need for excessive salt or additives. That’s a win for anyone trying to eat cleaner without sacrificing taste.
In fact, one medium-sized onion contains fiber, potassium, and only about 44 calories. Even when cooked, onions retain many of their healthful elements, especially when you don’t overdo it on added fats or sugars.
| Nutrient | Value per 100g (raw) |
|---|---|
| Calories | 44 |
| Fiber | 1.9g |
| Potassium | 146mg |
| Vitamin C | 7.4mg |
| Quercetin | Antioxidant-rich |
Adding caramelized onions to your meals is a simple way to boost both flavor and nutrition without turning to artificial seasonings or heavy sauces.
Flavor Enhancements and Recipe Versatility
One of the top reasons cooks love caramelized onions is their ability to completely transform a dish. Their natural sweetness and umami flavor enhance almost any savory recipe. They make burgers more gourmet, sandwiches more savory, and pasta richer and more complex. You can even blend them into dips, layer them on pizzas, or stir them into risottos and soups.
Here are a few ways caramelized onions elevate common dishes:
- Burgers and Sandwiches – Add depth and sweetness that contrast beautifully with savory meat or cheese.
- Soups and Stews – Use as a flavor base to enhance broth or stock with natural richness.
- Pasta and Risotto – Stir in for luxurious texture and sweetness without cream or sugar.
- Vegan and Vegetarian Dishes – Bring umami to meat-free meals using just a plant-based ingredient.
Because they freeze well and reheat easily, you can make a large batch of caramelized onions and use them throughout the week. They’re a go-to staple for anyone who cooks from scratch.
Looking for inspiration? Try these broccoli cheese casseroles that get a flavor boost from sweet onions
Choosing the Right Onion for Caramelizing
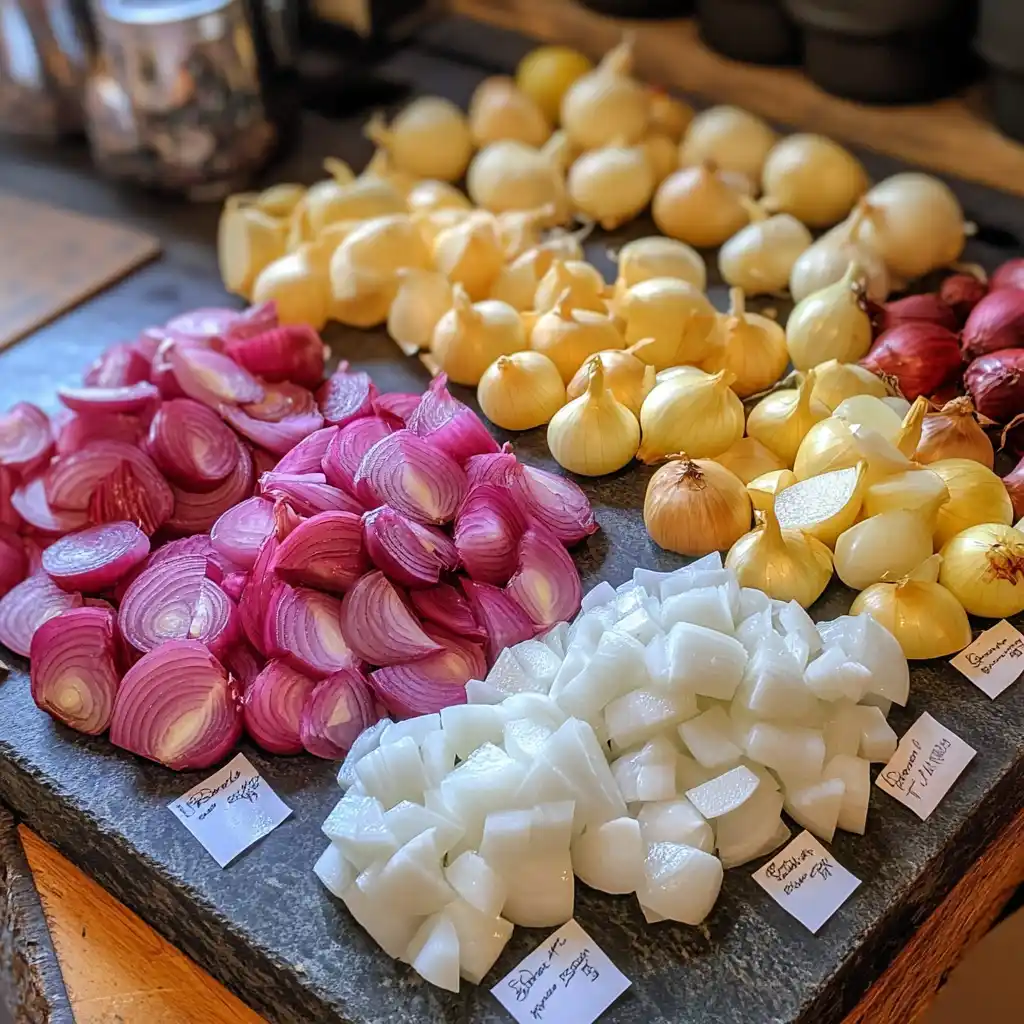
Best Onion Varieties (Yellow, White, Red, Sweet)
Choosing the right onion is a game-changer when it comes to making perfectly caramelized onions. While you can caramelize any variety, some types perform better than others thanks to their natural sugar and moisture levels.
Let’s break down the most common options:
| Onion Type | Flavor When Caramelized | Ideal For |
|---|---|---|
| Yellow | Deep, balanced sweet-savory | All-purpose caramelized onions |
| White | Mild, clean, slightly sharper | Mexican dishes, lighter flavor bases |
| Red | Sweet but tangy, turns deep red | Toppings for burgers, pizzas, meats |
| Sweet | Very sugary, mild acidity | Great for fast caramelization, snacks |
Yellow onions are the go-to for traditional caramelizing. They offer the perfect balance of sugar and pungency, allowing you to develop rich flavor without any additives. Sweet onions like Vidalia or Walla Walla are naturally higher in sugar, which means they caramelize faster but can burn more easily if not watched carefully.
On the flip side, red onions create a uniquely vibrant and tangy-sweet result that’s perfect for more adventurous recipes. Though less common, white onions can still be caramelized successfully, especially when paired with bold or spicy dishes.
How Onion Type Affects Flavor and Texture
Your choice of onion doesn’t just affect the sweetness—it can totally reshape the final taste and texture of your dish. High-sugar onions (like sweet or yellow) will brown more quickly and develop a jammy consistency. Low-sugar onions may take longer to caramelize and result in a subtler taste, but offer more control and complexity.
Here’s what to consider when choosing:
- Flavor Goals: Want bold, complex flavor? Stick with yellow. Prefer mild sweetness? Go for sweet onions.
- Time: Need it done faster? Sweet onions are your friend. Have time to go slow? Yellow gives the best payoff.
- Visual Appeal: Red onions offer stunning color and contrast but can taste slightly acidic unless cooked thoroughly.
Pro tip: Mix onion types for layered flavor. A blend of yellow and red onions offers both depth and brightness—ideal for pizzas and grain bowls.
Step-by-Step Guide on How to Caramelize Onions
Tools and Ingredients You’ll Need
Before you start, gather everything you’ll need to make sure the process is smooth and mess-free. Making caramelized onions isn’t complicated, but having the right tools and ingredients on hand makes a big difference.
Essential Tools:
- Large heavy-bottomed skillet or sauté pan (cast iron or stainless steel preferred)
- Sharp chef’s knife or mandoline
- Wooden spoon or silicone spatula
- Measuring spoons
Core Ingredients:
- 2–3 large yellow onions (or onion type of choice)
- 2 tablespoons olive oil, butter, or a mix of both
- A pinch of salt
- Optional: ½ teaspoon of sugar, a splash of vinegar (balsamic or apple cider)
Depending on the method you choose, you might also want a lid to help steam the onions early in the cooking process.
Detailed Instructions for Perfect Caramelization
Let’s break down the process so you get perfectly golden, jammy caramelized onions every time. This method uses medium-low heat and requires 35–45 minutes for best results.
Step-by-Step Process:
- Slice the Onions Evenly
Peel your onions and slice them thinly (about 1/8 inch thick). Uniform slices ensure even cooking. Thicker slices will take longer to caramelize, but they’ll yield a meatier texture. - Heat the Pan and Add Fat
Place your pan over medium-low heat. Add olive oil, butter, or a mix. Butter gives richer flavor, while oil helps prevent burning. Let it melt fully before adding onions. - Add Onions and Salt
Toss the sliced onions into the pan and stir to coat them in fat. Add a pinch of salt—it helps break down the onions and draws out moisture, speeding up caramelization. - Cook Slowly and Stir Frequently
Let the onions cook slowly. Stir every 5–10 minutes to prevent sticking and encourage even browning. If they start to burn, reduce the heat and add a splash of water or vinegar. - Optional: Add Sugar or Vinegar
After about 20 minutes, you can add ½ tsp of sugar to speed up browning. For a more tangy profile, add a splash of vinegar near the end of cooking. - Continue Until Deep Golden Brown
After 35–45 minutes, the onions will have shrunk significantly and turned a deep amber color. Taste and adjust seasoning as needed. - Cool and Store Properly
Let cool before storing. Caramelized onions can be kept in the fridge for up to 5 days or frozen for 2–3 months.
| Time | What’s Happening |
|---|---|
| 0–10 min | Onions soften, start to release water |
| 10–20 min | Light browning begins, aroma deepens |
| 20–35 min | Sugars break down, color deepens |
| 35–45 min | Deep amber color, sweet and savory flavor |
Butter or Oil? The Great Debate
Pros and Cons of Butter vs. Oil
When it comes to cooking perfect caramelized onions, one of the biggest questions people ask is: Should I use butter or oil? The truth is, both work—but each has its own flavor profile and impact on the caramelization process.
Let’s break down the differences:
| Fat Type | Flavor | Smoke Point | Best For |
|---|---|---|---|
| Butter | Rich, creamy, slightly nutty | ~300°F | Deep flavor, classic French-style onions |
| Olive Oil | Fruity, smooth | ~375°F | Cleaner taste, higher-heat tolerance |
| Combo (Butter + Oil) | Best of both | Balances flavor and function | Most balanced choice |
Butter delivers richness and depth but has a lower smoke point, which means it can burn if your pan gets too hot. On the other hand, olive oil resists burning and offers a lighter, fresher flavor—but it lacks the creaminess of butter. That’s why many chefs recommend using both. A 1:1 mix gives you the savory boost of butter while maintaining the temperature stability of oil.
How Fat Choices Influence Flavor and Browning
Fat isn’t just about preventing sticking—it dramatically shapes the final flavor and texture of caramelized onions. Butter browns as it cooks, adding nutty notes to the onions. It also helps create a glossy, luxurious texture. Olive oil, with its higher smoke point, allows for slower browning without the risk of bitterness or burning.
If you’re vegan or dairy-free, you can use:
- Avocado oil for neutral flavor and high heat tolerance
- Vegan butter for creaminess and rich finish
- Ghee for a clarified butter option with higher smoke point
Here’s what different fat choices do to your onions:
- Butter alone: Rich, silky, softer texture
- Oil alone: Clean, slightly firmer finish
- Both combined: Balanced sweetness and smooth texture
Check out how caramelized onions can level up your chicken stir-fry dishes
To Add Sugar or Not?
When and Why to Add Sugar for Caramelizing Onions
A common question home cooks ask when making caramelized onions is: Should I add sugar? The short answer: it depends. While onions naturally contain sugars that break down during slow cooking, a tiny bit of added sugar can enhance browning and deepen sweetness—especially if you’re short on time or working with less-sweet onion varieties.
Sugar isn’t essential, but it can:
- Speed up the browning process when onions aren’t very sweet
- Balance acidity in certain dishes like tomato-based sauces
- Enhance color for more visual appeal
You typically don’t need more than ½ teaspoon of sugar per two large onions. Add it around the 15–20 minute mark when the onions begin to soften and turn golden.
| Onion Type | Sugar Needed? | Notes |
|---|---|---|
| Yellow | Rarely | Already sweet enough |
| White | Sometimes | Mild, can benefit from sugar |
| Red | Rarely | Has natural tang and sweetness |
| Sweet (Vidalia) | Never | High in natural sugars |
Adding sugar too early may cause premature browning or even burning. Timing is key.
Alternative Ingredients to Enhance Sweetness Naturally
If you’d rather skip refined sugar, there are several natural options that can help you achieve beautifully caramelized onions without compromising taste.
Natural alternatives include:
- Balsamic vinegar – Adds sweetness and acidity; use in the last 5 minutes of cooking
- Maple syrup – Just a touch goes a long way, especially with red onions
- Coconut sugar – A lower-glycemic option with a caramel-like taste
- Apple cider vinegar – Adds complexity while lifting sweetness naturally
These alternatives don’t just substitute sugar—they contribute their own unique flavors. A splash of balsamic gives depth and color, while maple syrup adds earthy sweetness.
Using these ingredients gives you flexibility while keeping your caramelized onions free of refined sugar.
Common Mistakes and How to Avoid Them
Burning Instead of Browning
One of the most frustrating mistakes when making caramelized onions is ending up with burnt onions instead of golden, sweet perfection. Browning takes patience—caramelizing is not a quick process. Many people turn the heat up too high, thinking it’ll save time. Big mistake.
Here’s how to avoid burning your onions:
- Use low heat: Keep your burner on low to medium-low throughout the entire process.
- Stir often: Every 5–10 minutes, give the onions a good stir to prevent sticking.
- Don’t walk away: Stay nearby and monitor the process. Onions can go from golden to burnt fast.
- Add liquid if needed: If the pan gets too dry, deglaze with a splash of water, broth, or vinegar to loosen up the fond (browned bits).
| Problem | Cause | Fix |
|---|---|---|
| Onions burned | Heat too high or not stirred | Reduce heat, stir more frequently |
| Bitter flavor | Burnt sugars | Deglaze pan with vinegar or water |
| Dry texture | Pan too hot, no moisture | Add a lid early or a splash of liquid mid-cook |
Cooking Too Fast or Using High Heat
Another common error? Trying to rush the process. Caramelization is all about low and slow. Using high heat may soften onions quickly, but it won’t give you the sweet, jammy texture that makes caramelized onions so addictive.
Here’s what rushing gets you:
- Uneven cooking – Some slices overcook, others undercook.
- Bitter taste – Sugars burn before they caramelize.
- Missed flavor depth – Skipping the slow build of umami-rich compounds.
Tips to slow down and do it right:
- Use a wide pan to spread onions evenly.
- Don’t overcrowd the pan—too many onions at once will steam, not brown.
- Be patient. True caramelization takes 35–45 minutes, minimum.
Remember, making great caramelized onions isn’t hard—it just takes time and care. Skip the shortcuts and your taste buds will thank you.
Delicious Recipes That Use Caramelized Onions
Soups, Pastas, and Sandwiches Featuring Caramelized Onions
Once you’ve mastered the art of making caramelized onions, it’s time to let them shine. These sweet-savory gems elevate almost any dish and can be used as a base, topping, or flavor enhancer.
Here are some classic ways to use them:
- French Onion Soup – The ultimate use of caramelized onions. Their deep flavor forms the soul of this comforting classic.
- Grilled Cheese with Caramelized Onions – Sweet onions paired with sharp cheddar create a melty, mouthwatering combo.
- Creamy Pasta Dishes – Fold caramelized onions into alfredo, carbonara, or even mac & cheese for a savory kick.
- Paninis and Melts – Add to turkey, roast beef, or vegetarian sandwiches for an instant upgrade.
Want something lighter? Add them to:
- Salads – Warm caramelized onions tossed with spinach or arugula and goat cheese
- Wraps – Great in chicken wraps or falafel pitas
- Savory oatmeal – Add to steel-cut oats with a soft egg and shredded cheddar for a high-protein breakfast
Creative Ideas: Pizzas, Dips, and Vegan Meals
Let’s go beyond the basics. Caramelized onions are surprisingly versatile and work beautifully in less traditional recipes, too. Their umami-rich profile blends seamlessly with both bold and subtle ingredients.
Here are some creative dishes to try:
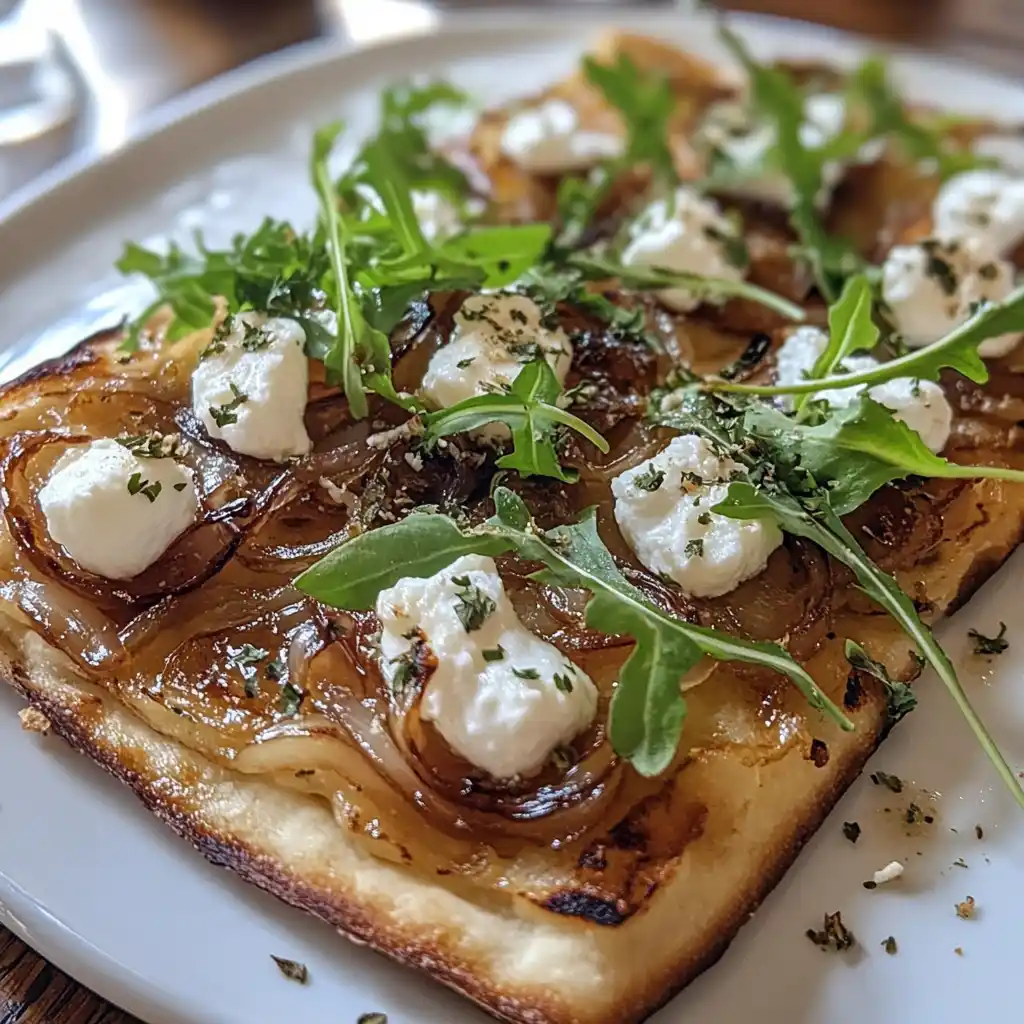
- Flatbreads and Pizzas – Add a layer of caramelized onions to mushroom, blue cheese, or fig pizzas. They balance sweetness with earthy or tangy toppings.
- Caramelized Onion Dip – Mix into sour cream or Greek yogurt with chives and garlic for an unforgettable party dip.
- Stuffed Peppers or Mushrooms – Combine with quinoa, feta, and herbs for a rich vegetarian filling.
- Vegan Tacos – Layer onto roasted vegetables or lentils for added depth and texture.
Caramelized onions also make excellent burger toppings, savory galette fillings, and mix-ins for risottos or grain bowls. Freeze extras in small portions to pull out and instantly elevate weeknight meals.
Discover great ideas like this high-protein egg salad sandwich that pairs well with sweet onions
Storage, Reheating, and Meal Prep Tips
How to Store Caramelized Onions (Short and Long Term)
After investing the time to make a batch of golden, sweet caramelized onions, the last thing you want is for them to go to waste. Thankfully, they store well and even improve in flavor over time.
Here’s how to do it right:
In the Fridge:
- Let onions cool completely.
- Store in an airtight container or a small mason jar.
- Keeps fresh for up to 5 days.
In the Freezer:
- Portion into ice cube trays or silicone molds.
- Once frozen, transfer to a freezer-safe bag.
- Good for up to 3 months.
Label and date your containers so you know how long they’ve been stored. A little prep now means you can have delicious caramelized onions ready to go any day of the week.
Reheating Without Losing Flavor or Texture
To preserve the taste and texture of caramelized onions, reheating requires a little finesse. You don’t want them to dry out or burn.
Reheating Tips:
- Microwave: Add a splash of water or broth, cover loosely, and heat in 20-second bursts.
- Stovetop: Warm gently in a skillet over low heat with a teaspoon of oil or butter.
- Oven: Reheat with other dishes at 300°F for 10–12 minutes, covered with foil to retain moisture.
Avoid high heat or long cooking, which can dull the flavor or dry them out.
FAQs About Caramelized Onions
How to caramelize an onion?
Do you use butter or oil to caramelize onions?
What is a caramelized onion?
Do you add sugar to onions to caramelize them?
Conclusion: Make Caramelized Onions a Weekly Staple
Caramelized onions are more than just a garnish—they’re a powerful flavor tool every home cook should master. From soups and sandwiches to dips and vegan mains, these golden gems add depth and sweetness that elevate nearly any meal. With the tips, techniques, and recipes we’ve covered here, you’re set to turn everyday onions into culinary gold.
Print
Caramelized Onions
Slow-cooked onions transformed into sweet, golden perfection—rich, and perfect for burgers, pastas, soups, and more.
- Total Time: 50 minutes
- Yield: 1½ cups
Ingredients
-
2–3 large yellow onions, thinly sliced
-
2 tablespoons olive oil, butter, or a mix
-
A pinch of salt
-
½ teaspoon sugar (optional)
-
1 tablespoon balsamic or apple cider vinegar (optional)
Instructions
-
Peel and slice onions evenly, about 1/8-inch thick.
-
Heat a large skillet over medium-low heat and add oil, butter, or both.
-
Add onions and salt, stir to coat in fat.
-
Cook slowly, stirring every 5–10 minutes to prevent burning.
-
After 20 minutes, optionally add sugar to enhance browning.
-
Continue cooking 35–45 minutes until onions are deep golden and jammy.
-
Add vinegar in the last 5 minutes for added depth, if desired.
-
Let cool before storing or serving.
Notes
Use a mix of yellow and red onions for layered flavor. Caramelized onions freeze well—store in small portions for easy use in future meals.
- Prep Time: 5 minutes
- Cook Time: 45 minutes
- Category: Condiment
- Method: Stovetop
- Cuisine: French-Inspired